Sunday, January 30, 2011

Cottage Exercise Room

Simple and welcoming are words that I  often hear used to describe what I love most about cottage style. So it was obvious I needed to use those two words to guide my design of the new exercise room. Foremost, I wanted it to be a space I looked forward to going into. It had to be inviting as well as motivating. Most importantly however, it had to be a room that would not only look good but that I would use!


Small May Be More
No need for lots of intimidating equipment here. Just enough space for one major piece of equipment and enough floor space to  stretch and do some yoga. This room is tiny, only five feet by nine but thats perfectly fine. Fitness expert, Jessica Smith in article at  Better Homes and Gardens  says, "Some of the most effective workouts come from simplicity- simple equipment and minimal space can help you create a regular, effective workout routine."


To keep workout routines for becoming monotonous, there are a few extra exercise tools I incorporated to use for variety- resistance cords, an exercise ball, weights.

Color
I chose colors that would create a comfortable yet invigorating atmosphere. The lime green and turquoise wake me up and make me want to get moving.

This canvas I painted with my color scheme and then decoupaged on images of simple stretch  and ball exercises for easy reference plus a light-hearted reminder.


Storage
The lime cabinet adds a punch of color but also neatly stores all the exercise videos and dvds, weights, yoga blocks and towels.


Inspiration
Being surrounded by inspirational images and words is critical in a space like this. A memo board hangs above the cabinet- a place where I can tack up motivating quotes and pictures and easily change them as often as I like.


Instead of an all out beach theme, the starfish and shells are the subtle reminders I need that bathing suit season is just around the corner. The yearly planner I purchased to track my progress also features palm trees and beach scenes.


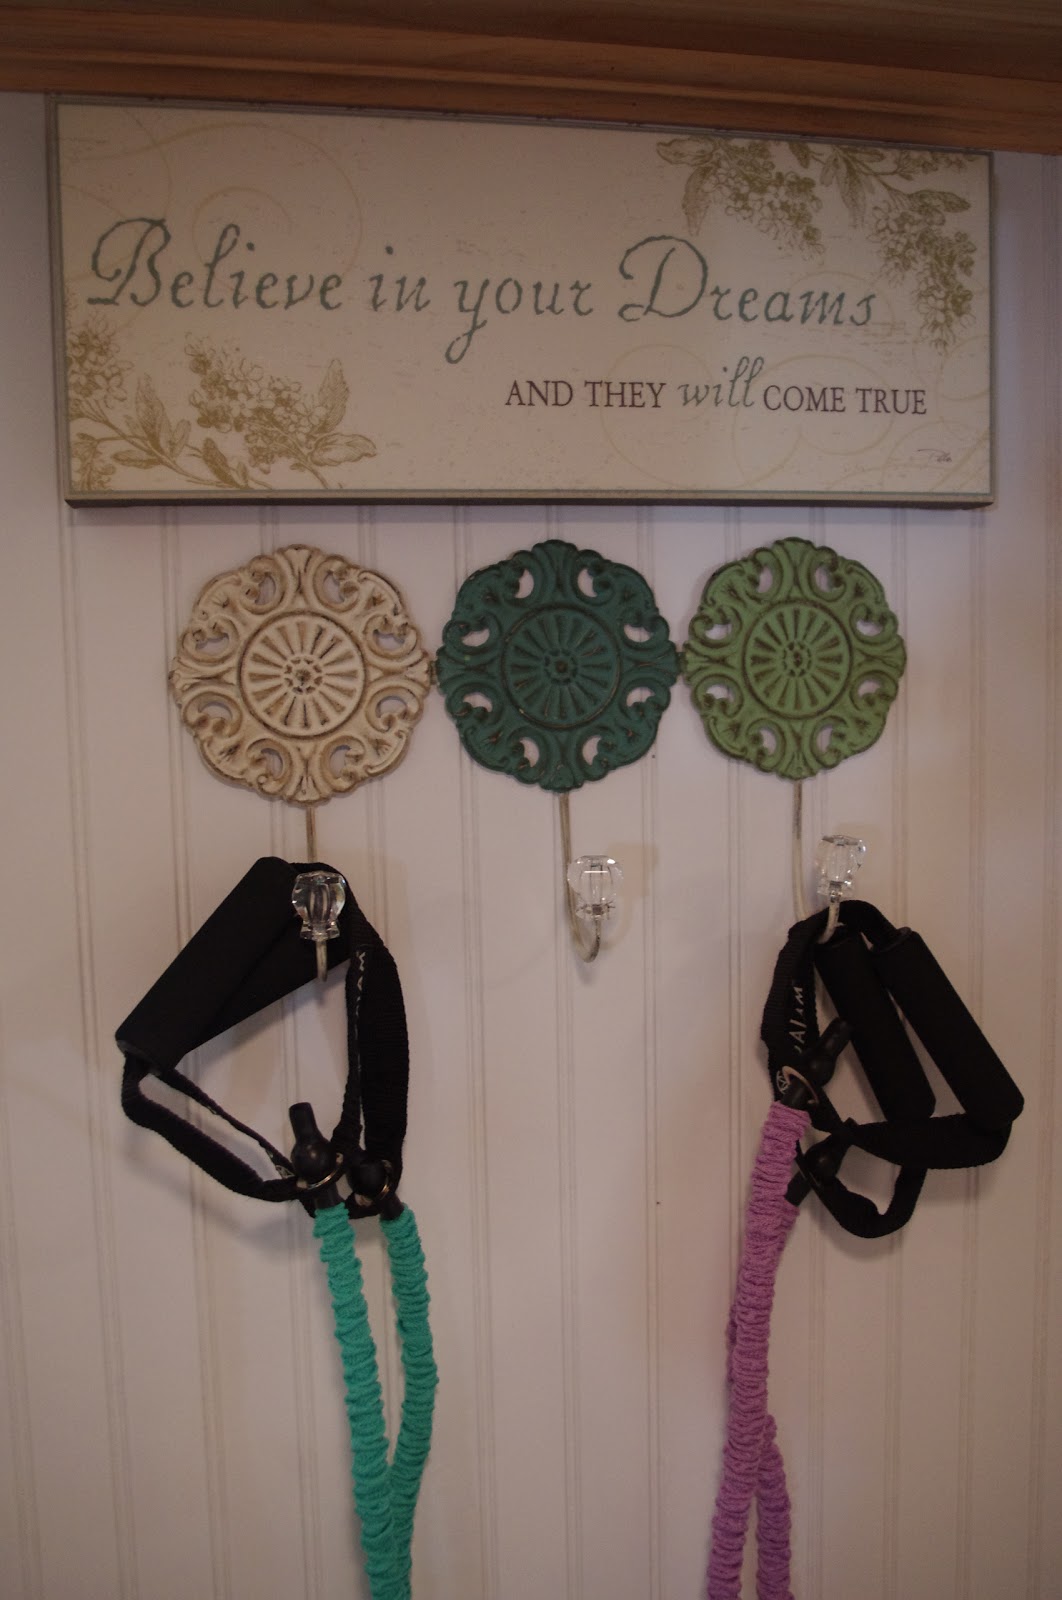
The mirrors I etched  with the words- aspire, believe, energize and achieve.


Waking the Senses
Any well decorated room will please all the senses including your nose. Keeping the room smelling nice is key especially in a room where there will be lots of sweat. This reed diffuser decorated with shells accomplishs just that. The plants help give the room a fresh look and also help clean and purify the air.


With a simple, motivating space like this I am well on my way to a healthier me.


Linking to these great parties. Check out all the talent too!

Thursday, January 27, 2011

One of those days...

We are stuck in the house on another snow day and I feel a case of some serious cabin fever about to settle in.
A little dose of "why we love snow days" is in order. Lest we forget why we start wishing for these days in the first place.
First remedy, pile on the marshmellows.
Why just cover the top of your hot cocoa when you can cover the top of your cupcake too?


An extra special sugary snow day treat, is just what the doctor ordered for the girls.
As for this housebound mom, staying in my pjs all day will do just as nicely.

Monday, January 17, 2011

building the exercise room

When I first came up with this crazy idea to carve out some space in the basement for exercising, I thought we could just hang some curtains to section off the space. It was Mr. Cabin who suggested we actually build a real room with real walls and a real door. I don't know why I am suprized with the way it came out. After all, this man did build me an entire cabin- he evidentally knows what he is doing! Yet his carpentry skills never cease to amaze.
He turned an icky section of the basement that looked like this-

...into this.


Because Mr. Cabin loathes spackling and sanding we decided not use traditional sheetrock. He suggested this beadboard paneling and because I love the cottage look of beadboard, I was all for it.


I wanted to leave the beams exposed in the ceiling but they were pretty disgusting and Mr. Cabin said it wouldn't look good so instead he used cedar planking.
I love the rustic combination of the cedar and the beadboard.


Mr. Cabin suprized me with these recessed lights and trim rings.


We used carpet tiles on the floor. The floor is very uneven so this was the easiest option.

Now that the building is done, it is my turn to decorate and turn it into an exercise room.
It has to be one heck of an inviting and invigorating space that I will use all the time. If I don't, Mr.Cabin has threathened to turn the room into his video game lounge!

Saturday, January 8, 2011

Motivational Mirrors: Etching Tutorial

 While Mr. Cabin has been toiling away in the basement trying to finish building me my little exercise room, I have been busy with a few projects of my own trying to make the space inviting and inspiring.

Most traditional gym and exercise spaces feature an entire wall of mirrors. While I have nothing against giant mirrors, purchasing one for the space was not within our budget.
 Besides I already know what I look like, right? Only staring at myself sweating while I was exercising- not very motivating. So I decided to use several smaller mirrors which I am going to incorporate into a collage with some other art work.
To get more bang for my decorating buck and my wall space as well, I decided to try etching different motivational words onto each of the mirrors.
If you would like to try it out too, here's what you'll need: mirror or glass, etching cream, an exacto knife, clear contact paper and words or images printed on paper.

Here's what I did. First, I printed out the words I chose from the computer. Then I cut out large pieces of contact paper. I made the contact paper pieces slighter larger than my 12 x 12 mirrors.


Next, I taped the words upside down to the underside of the contact paper.


Then I flipped the paper over and traced each word onto the vinyl.


Then I removed the words and the paper backing from the contact paper and carefully adhered the sheet to the mirror. I used a credit card to help smooth out the bubbles. The extra contact paper I rolled over the edges, which helped protect me from being cut  while I was handling the mirror.


Next, I used an exacto knife to cut out each letter. I have to mention my new favorite letter of the alphabet is now v...such a simple letter to cut out- gotta love it.


Finally, I was ready to apply the etching cream. I will admit the warnings on the bottle did have me a little scared. "May be fatal," is not a warning I take lightly. So I donned my protective goggles, a pair of chemical resistant latex gloves and turned the exhaust fan on in the kitchen before I was ready to proceed.


I  followed the directions on the bottle. I applied a think layer of etching cream, waited five minutes then rinsed with water.


The finished product.
I was actually surprised with how easy this was.
I may even try etching words on a bathroom mirror soon too.


Anyone curious what the other words I chose were?
Come on back for the grand reveal of the exercise room.
Cross your fingers for me it will be real soon,

Wednesday, January 5, 2011

Bathroom Make-do

Centsational Girl is hosting a link party on bathroom makeovers. Our upstairs bathroom wasn't a make-over but more of a make-do. This bathroom needs to be gutted completely and totally redone!
 In the meantime,  here are the few things we have done to make it a more enjoyable space.


The bottom half of the walls is yellow FRP.
(I had no idea what that was- I had to ask Mr. Cabin. According to him, FRP is fiberglass reinforced panels. Basically it is vinyl yellow paneling.)
You really can't paint over the FRP so I had to find a way to make it work.
Finding inspiration in the rug I bought, I chose to paint the top half purple. The two colors are a bright combination that works well in the small space.

I brought in the tower from the girl's old nursery. It used to hold diapers and things.
 Now it is the perfect place for the towels and the extra toilet paper.
The dragonfly print and the frog loofahs add a bit of whimsy and fun.


This vanity was white with gold. Yuck!
 So while we wait to rip it out completely,
 a little decorative painting  has become my favorite make-do of all.

Be sure to check out all the rest of the bathroom make-overs at Centsational Girls blog.
Related Posts Plugin for WordPress, Blogger...